Boiling water taps have changed the way kitchens run by providing on-demand hot water for cooking, cleaning, and drink-making. This guide offers a comprehensive, step-by-step process for installing a boiling water tap that will be seamless to follow.
What to Prepare Before Installing an Instant Hot Water Dispenser?
Preparation is key to an effortless installation. If you take some time to gather all the necessary tools and materials prior to installation, it may save you quite a lot of trouble later.
Here are the tools and materials that you will need:
| Boiling Water Tap Kit | Ensure it includes the tap, boiler, hoses, and necessary fittings. Check the product page to confirm all parts are present. |
| Tools | Adjustable wrench, screwdrivers (both flathead and Phillips), tape measure, pencil, drill, hole saw (if a new tap hole is needed), and pliers. |
| Plumbing Supplies | Teflon tape, flexible hoses, and possibly extra copper tubing. |
| Safety Gear | Don’t forget safety glasses and gloves to protect yourself during the installation process. |
Additionally, review the product page for specific requirements and recommendations. Check if your kitchen’s water pressure and supply valve locations meet the installation criteria. A quick consultation with your customer service team can clarify any product-specific queries.
Step 1: Isolate Your Water Supply
Begin by isolating your water supply to prevent leaks and water damage during installation. Locate the main water supply valve, typically found under the sink or in the utility room, and turn it off. To ensure the pipes are completely drained, open your existing tap fully and let the water run until it stops. Label the hot and cold water valves with tape and a marker to avoid confusion during reconnection.
Step 2: Clearing the Location for Installation
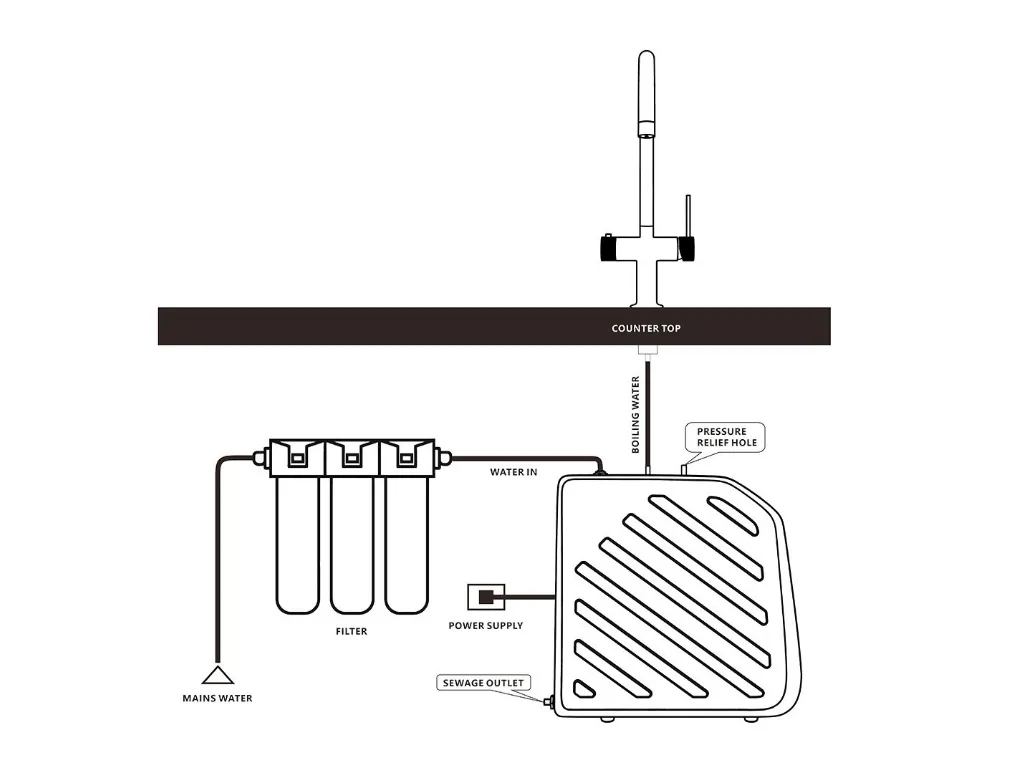
The best location for your boiler is often on the cupboard wall nearest to the tap so that both the power supply and water lines will be easily accessible. Most boilers come with a power cable about 1.5 to 2 meters long. Put the boiler close enough to a safe plug socket so that you don’t overstretch or strain its cable. Take everything out of under sink storage, ensuring enough space is available for the boiling tank and filter while leaving some room around it for ventilation and connection access.
JNOD’s boiling water tanks exist in two sizes: the 3L tank (312mm depth, 207mm width, 456mm height) and the smaller one which holds 2.6L (288mm depth, 190mm width, 312mm height). Also included in the kit is a filter measuring; 254 mm at top width; 150 mm at bottom width; 355 mm high.
Step 3: Remove the Old Tap
With your workspace ready, it’s time to take out the old tap.
First, crawl under the sink and locate the connections for your existing tap. Using an adjustable wrench, disconnect the water supply lines. There might be some residual water in the pipes, so have a towel or small bucket ready to catch any drips.
Next, grab a basin wrench to unscrew the mounting nuts holding the tap in place. These nuts can be a bit tricky to reach, so take your time to ensure you have a good grip. As you loosen the nuts, support the tap from above to keep it from falling.
Once the nuts are off, lift the old tap out of the sink. Take a moment to clean the area around the tap hole to remove any debris or buildup. A clean surface will make the installation of your new boiling water tap much smoother.
Step 4: Install the New Boiling Water Tap
Fix your new boiling water tap into the worktop’s pre-drilled hole. If a new hole is required, use a hole saw to drill the appropriate size, typically 38mm. Insert the hot and cold feeds and any additional wiring through the sink hole. Make sure all necessary connections are included to avoid any disassembly later. Insert the tap through the hole and make sure the tap is aligned correctly on your worktop, with the handle facing the right direction for easy use.
While holding the tap steady from above, move under the sink and secure it. Make sure the supplied rubber gasket is properly positioned around the tap base. This gasket creates a watertight seal, preventing any leaks. Carefully tighten the mounting screws, making sure not to over-tighten, as this could damage the tap or the worktop.
Step 5: Connect the Boiler
The boiler should be connected to the boiling water tap via flexible hoses that come with it. Consult the manufacturer’s instructions for specific connections. One hose typically connects cold water supply to the boiler inlet while another one links the boiler outlet to a tap. To avoid gas leaks, use Teflon tape on threaded connections. Make sure all plumbing joints are firm but not too tight as this may damage fittings.
Check that cold water pressure falls within the manufacturer’s recommended range usually between 2-3 bars (29-43 psi). Ensure there are no sharp bends or twists in the routes of hoses that would hinder the flow of water and cause damage over time. Clamps or ties might be needed to hold them in place; otherwise, they would leak, move about, and disconnect.
Step 6: Fill the Boiler & Check for Leaks
Before you turn it on fill your boiler with water so as not to burn out its heating element. Open a valve on your main water line and let it flow into your boiler unit. Always consult with the product manual concerning filling and initial operation for it to be done in a correct manner.
While filing check all connections of your boiler carefully. Turn on full water supply and inspect pipes, valves, and taps for leakage points. Lay a dry cloth or paper towel beneath the joints so that even small leaks can be detected immediately. Tighten any loose connections if you observe any water escaping from them.
Step 7: Plug in and Turn on the Boiler
With the boiler now filled with water and all connections leak-free, it’s time to power it up. Plug the boiler into a nearby grounded outlet, making sure not to use an extension cord to avoid any fire risk. Turn on the boiler and allow it to start heating the water. Most units feature an indicator light that will let you know when the water is boiling and ready for use.
You May Like: How Do Boiling Water Taps Work? Your Ultimate Guide to Instant Hot Water Solutions
Step 8: Adjusting Water Temperature
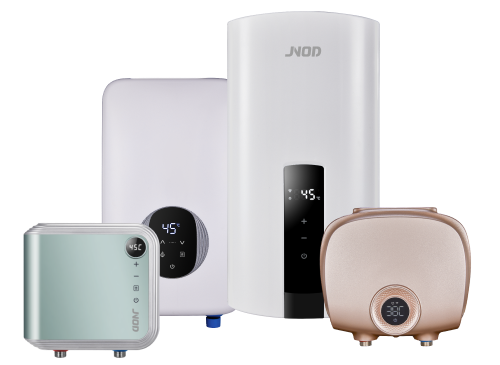
Fine-tune the water temperature as soon as the boiler becomes operational. Typically, boiling water taps have a thermostat or a dial for controlling temperatures. JNOD boiling taps have a digital display and allow the setting of the desired temperature in 5-degree increments. The range of adjustment typically goes from 45℃ to 98℃.
Optimize energy use by slightly lowering the temperature below boiling point for daily use. This will reduce electricity consumption and increase the lifespan of your equipment. Always follow the manufacturer’s instructions for guidance on what temperature is best for you. It is important to adjust your hot water tap’s heat properly so that its performance can be at its best while being convenient enough.
Experience JNOD Efficient Water Heating Solution
Discover the excellence of JNOD, a leading manufacturer of high-quality instant boiling water taps. With 15 years of expertise, JNOD offers advanced 3-in-1, 4-in-1, and 5-in-1 water tap systems, serving over 500 clients globally. Our products feature cutting-edge technology, including digital temperature controls ranging from 45℃ to 98℃, ensuring precise and efficient water heating. With a factory area of 6,800 m² and five production lines, JNOD guarantees top-tier quality and reliability, making us the preferred choice for instant hot water solutions.
Conclusion
Installing a boiling water tap can transform your kitchen experience, providing instant access to hot water. By following this detailed guide, you can confidently install your tap, ensuring a safe and efficient setup. Regular maintenance and troubleshooting boiling water tap will keep your system running smoothly, offering convenience and reliability for years to come.